
Manual
Installation:
Expresso consists of a group of files and directories that must be together in the same directory. Place them in the directory where you would like them to be and then in Layout go to Layout>>Plug-ins>>Add Plug-ins. Find the directory where you placed the files and select Expresso.lsc and ExpressoFit.lsc and hit open. Now they can be accessed from the Scene>>Generics menu.
Next you have to run a very simple setup process. Under the LScript tab choose LScript>>Lscript/RT and choose the ExpressoSetup.lsc file. What this plugin does is it makes sure the objects and textures of the controls will be placed every time and won't say that they can't be found. If it asks you to find a file (object or texture) you'll find them under the "Controls" or "Textures" directories. When you are asked if you want to save all objects or to clear the scene say "yes".
Once this is done, you'll never have go through this setup process again unless you move the files to a different location (and therefore changing the object and texture path).
Note: If you already had an earlier version and the new version is in the same directory, the setup is not necessary.
Running the plugins:
 Before you can run either of the scripts you must first load an object with EndoMorphs.
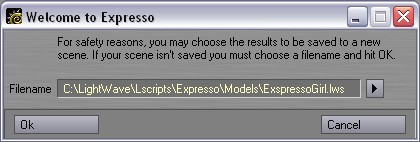
Once it is loaded, run the Expresso script (from the Generics menu). If you didn't save your scene before, you must save it here.
If your scene was already saved before you can save it as a new scene here just to be safe but it isn't obligatory.
Give a filename and hit OK.
Before you can run either of the scripts you must first load an object with EndoMorphs.
Once it is loaded, run the Expresso script (from the Generics menu). If you didn't save your scene before, you must save it here.
If your scene was already saved before you can save it as a new scene here just to be safe but it isn't obligatory.
Give a filename and hit OK.
Note: If your version of LightWave is smaller than 7.5c you have to make sure you do not have MorphMixer applied to the object or it will get added again. (Apparently a bug that got fixed.)
The next interface presents you with different inputs under two tabs.
Each pop up menu gives you the list of EndoMorphs in your object. For each of the stated movements you can apply an EndoMorph though you can leave some blank if you want.
All the check boxes control whether that part will get setup or not, other than the Single Brow Control check box that will make both brows controlled by the right brow control. If you don't have separate morph maps for each brow you can apply the morphs for one of the brows. In this case there is no need to check "Single Brow Control".
The Upper Lip control is meant for sneer type expressions.
"Emotion A" and "Emotion B" are 1D sliders (up and down) that control an emotion like happy/sad or scared/surprised.
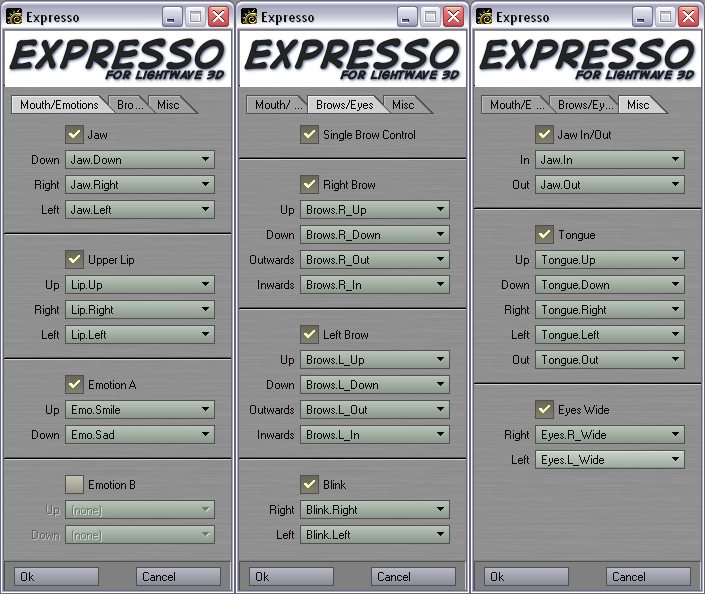
When you are done with customizing the options, hit OK to continue. You'll be asked if you want to load lights too. This is caused by loading items that will be used as controls from another scene. Choose "No". Choosing "Yes" will add a light to your scene but it won't affect it in any way.
It should take a couple seconds before it finishes. Once LightWave stops working it's time to run the second script: ExpressoFit. What this does is it centers the controls into your viewport. Before running it make sure one of your viewports is an orthographic viewport. Once you have run it, select the controls and play like a kid!
Note: Auto Key must be on in order to see the results in real time.
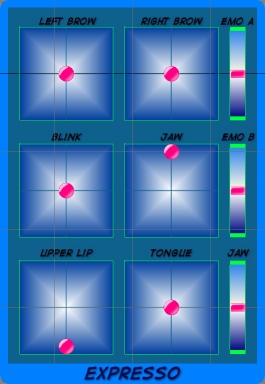
Each of the pink controls can be moved around to create different face expressions. Each part is described above the control. The blue bar at the bottom is used to move all the controls together.
To see the textures better you can go to the display options (shortcut: d) and change the OpenGL texture resolution.
If you don't like the backgrounds you can create your own custom ones by replacing the images in the "Textures" folder or by changing the surface properties.
I like best splitting the screen in to more than one viewports and having the face in one and the controls in another but it is aslo possible to parent the "Mover" control to the camera and see it in the cameras viewport.
Note: If you want each control to have twice the effect you can add another MorphMixer under the Deformation tab in the properties panel. To undo it make sure you get rid of the top most MorphMixer.
The final interface looks like (after resizing):
If you would like to completely get rid of the controls, select the mover control and clear it (shortcut: '-'). When it asks if you want to clear the descendants too choose "Yes".